Getting Started - NeuroPawn Kit
From unboxing to live EEG data — in under ten minutes.
Kit Contents
Section titled “Kit Contents”| Qty | Item |
|---|---|
| ×1 | Knight Board |
| ×1 | EEG Headset |
| ×8 | Dry Spike Electrodes |
| ×4 | Comfort Electrodes |
| ×1 | Conductive Paste |
| ×1 | Ear Clip |
| ×1 | USB-C to USB-C Cable |
Before You Begin
Section titled “Before You Begin”Download the EXG Visualizer — the free cross-platform app for real-time signal monitoring, FFT, and CSV export.
Part 1 — Hardware Assembly
Section titled “Part 1 — Hardware Assembly”-
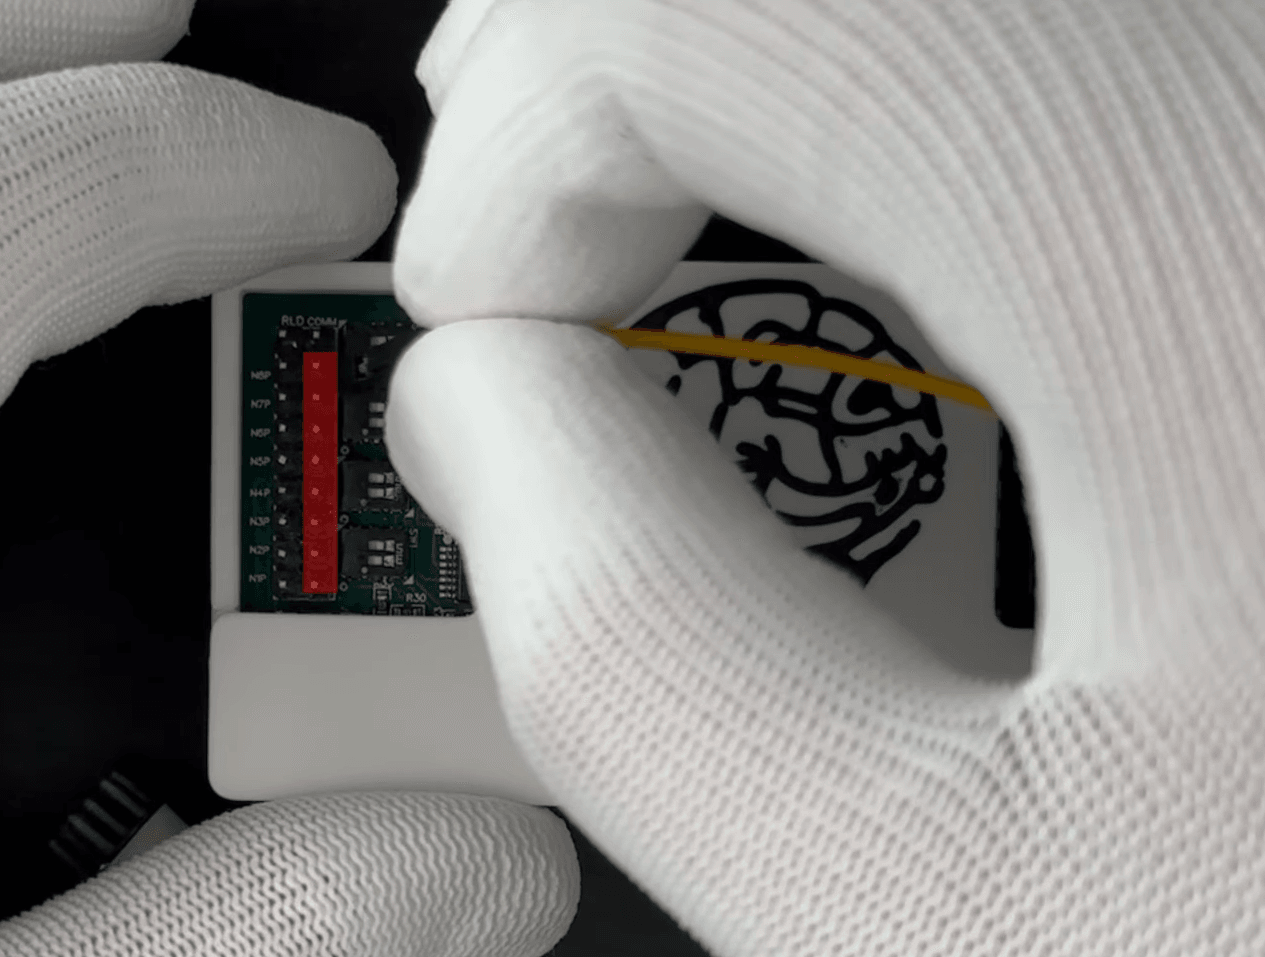
Attach each electrode to the positive rail on the Knight Board — the positive rail is highlighted in red.
-
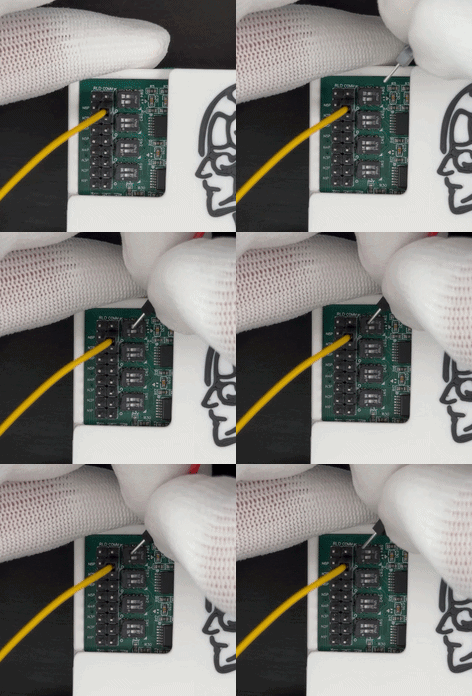
Turn channels on by flipping each switch away from the header. Channels are labeled 1 through 8.
-
Attach the ear clip cable to the pins labeled COMM and RLD on the board.
-
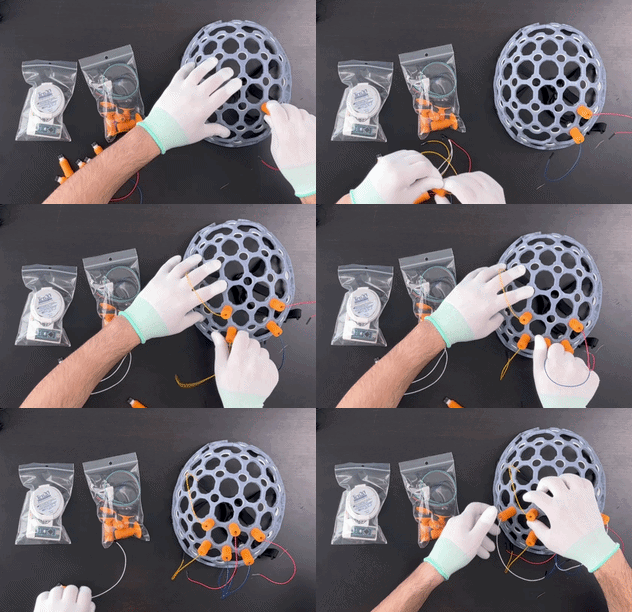
Screw the dry spike electrodes into the headset until they just catch the thread — you’ll tighten them fully once the headset is on.
-
Screw in the comfort electrodes the same way, finger-tight for now.
Part 2 — Wearing the Headset
Section titled “Part 2 — Wearing the Headset”-
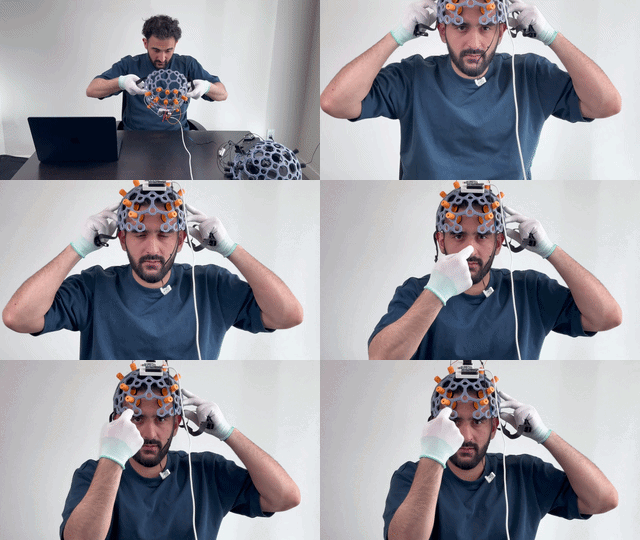
Put on the headset and line it up as shown — centre the frame across your forehead.
-
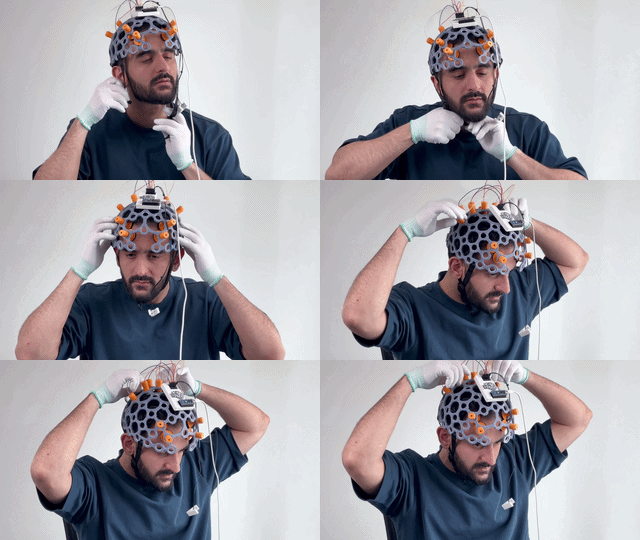
Fasten the chin strap snugly.
-
Tighten the comfort electrodes, then tighten the dry spike electrodes so the headset sits securely.
-
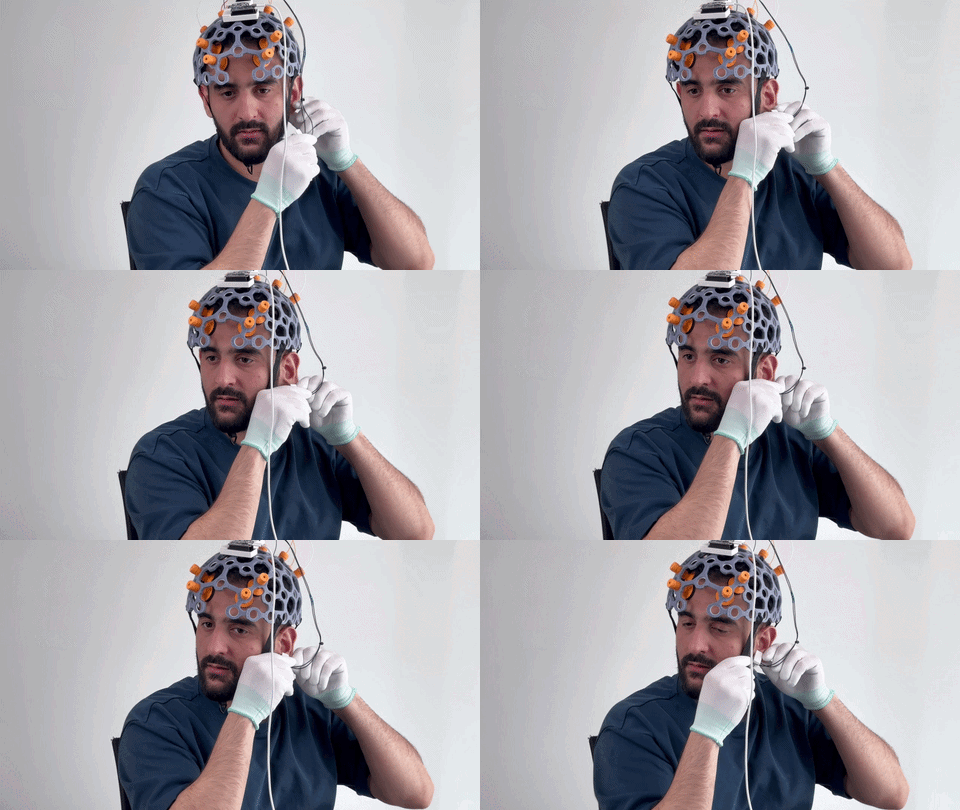
Attach the ear clip to your earlobe. For a better connection, rub a small amount of conductive paste into the earlobe before clipping on.
Part 3 — Software & Connection
Section titled “Part 3 — Software & Connection”-
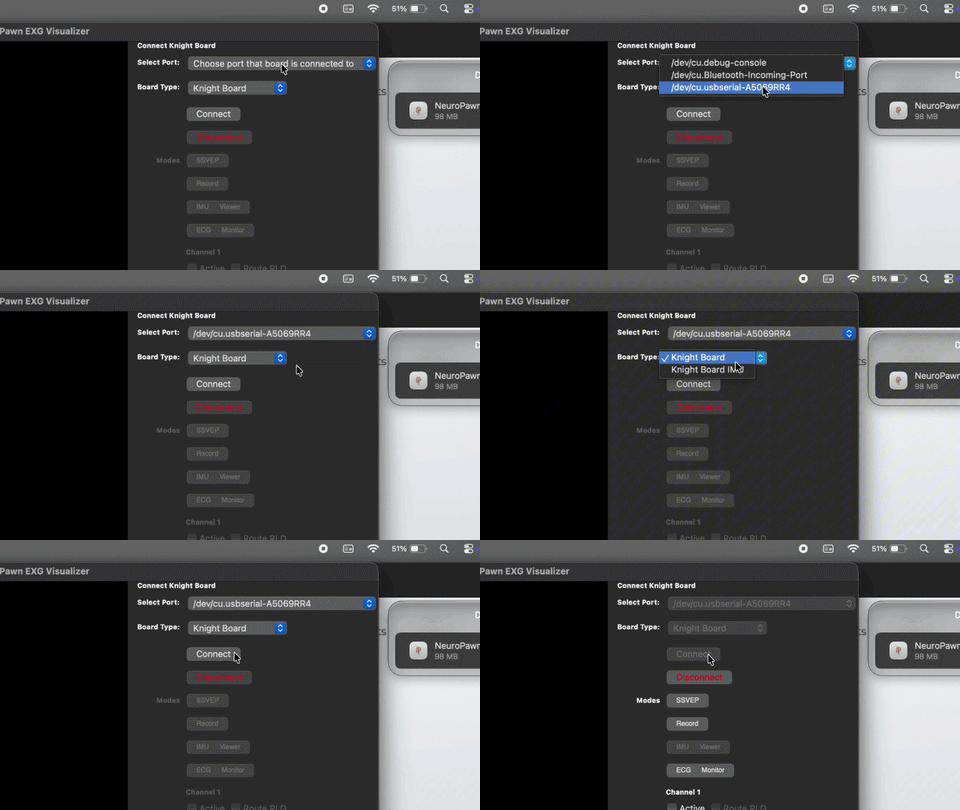
Plug the Knight Board into your computer via USB-C. The port list in the EXG Visualizer will populate with a new entry.
-
Click the new port entry, select your board type from the dropdown, and click Connect.
-
Turn on the channels you want to use.
-
Optionally enable RLD (right leg drive) to reduce noise — it is not required but can clean up the signal.
-
BrainFlow & LSL: You can also stream data via BrainFlow or the Lab Streaming Layer. Tutorials are available on our GitHub.
Verification & Testing
Section titled “Verification & Testing”Once connected, run two quick checks to confirm good electrode contact.
Jaw Clench Test
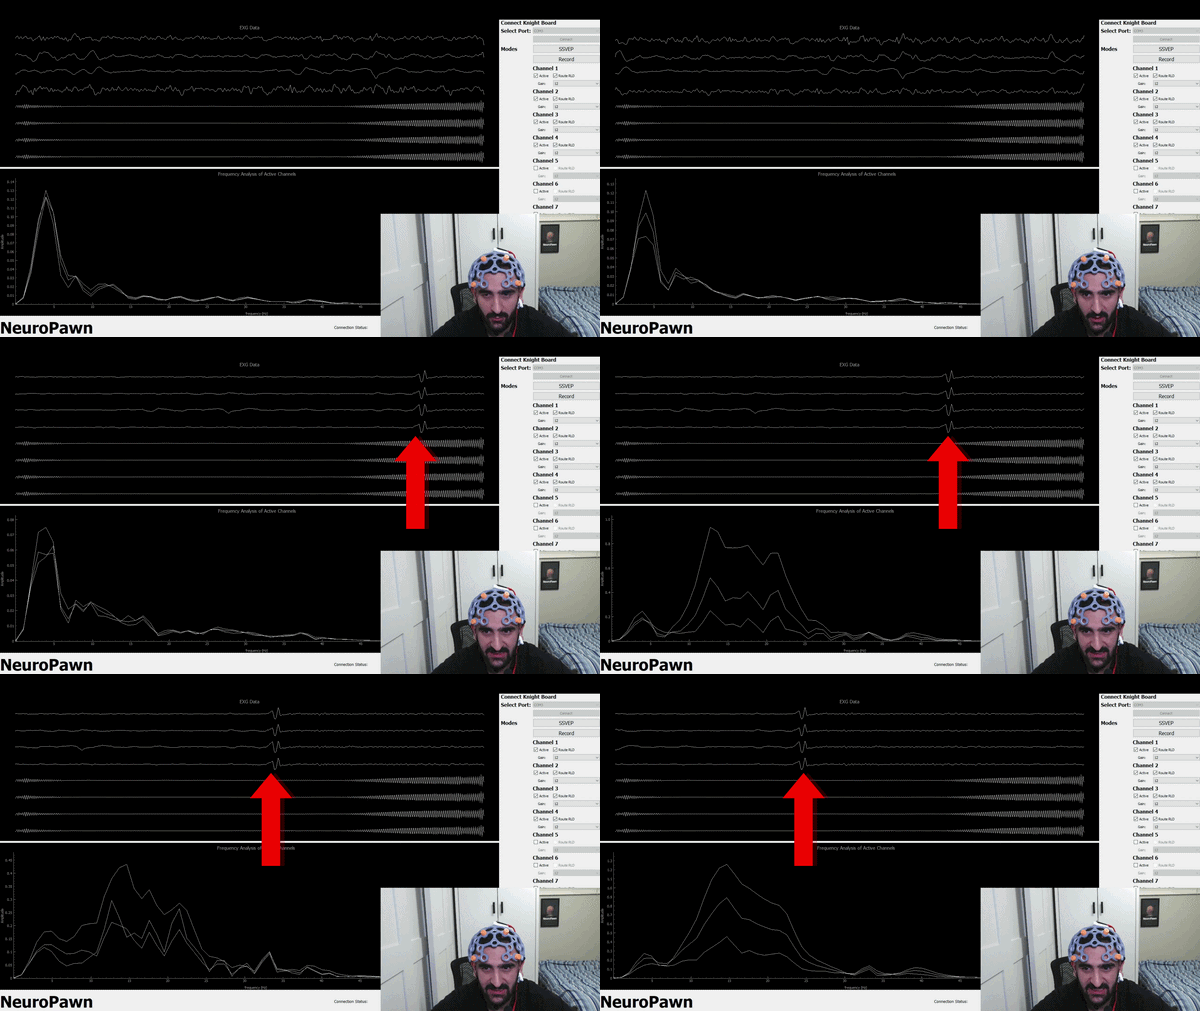
Clench your jaw firmly. All active channels should spike together. If only some spike, check electrode contact.
Eyes-Closed Test
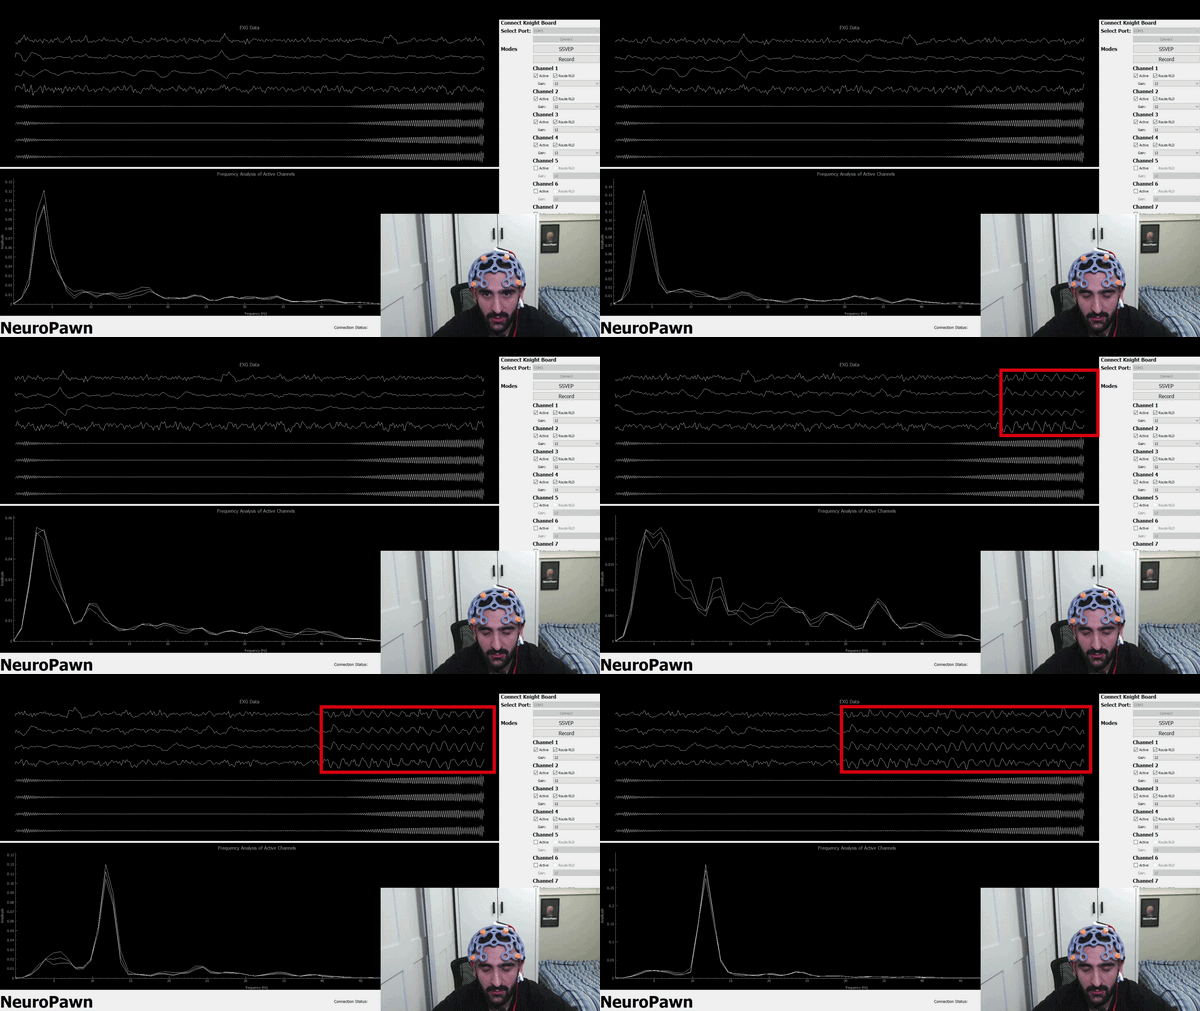
Close your eyes. You should see a characteristic decrease in signal frequency. If not, reseat the electrodes and part the hair so the spike tips make direct scalp contact.
Troubleshooting
Section titled “Troubleshooting”EXG Visualizer blocked from running
- macOS: open System Settings → Privacy & Security, scroll down, and click “Open Anyway” next to the app.
- Windows: click “More info” in the SmartScreen prompt, then click “Run anyway”.
Board not detected
- Ensure the Arduino board is properly seated and locked into the Knight Board.
- Try a different USB port or cable.
Noisy or erratic signal
- Re-seat dry spike electrodes — part the hair so the spike tips touch your scalp directly.
- Apply conductive paste to the earlobe and rub it in before reattaching the ear clip.
- Turn off all unused channels.
- Move away from heavy electronics, fluorescent lighting, or AC power cables.
Only some channels show activity
- Check each electrode connection at the board headers.
- Confirm RLD checkboxes are on for all active channels.
- Verify the dry spike tip is making direct scalp contact, not resting on hair.
Custom Code & BrainFlow
Section titled “Custom Code & BrainFlow”The Knight Board speaks BrainFlow natively. Use device ID NEUROPAWN_KNIGHT_BOARD
(or NEUROPAWN_KNIGHT_BOARD_IMU for the IMU variant) in any BrainFlow script to
stream data with Python, C++, Java, or any supported language.